How to Make Bracelets: Creative and Fun DIY Methods
Creating your own bracelets is not only a fantastic way to express your creativity but also a rewarding hobby that you can share with friends and family. Whether you’re making friendship bracelets, stunning beaded bracelets, or unique charm bracelets, there are numerous ways to dive into this delightful craft. In this article, we’ll explore **seven practical methods** for making various types of bracelets and share creative tips to inspire your next project.
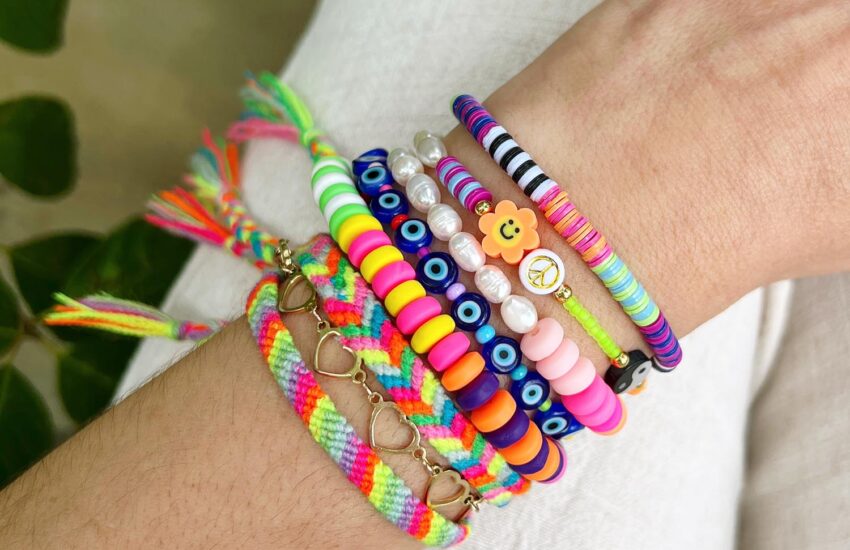
1. Beaded Bracelets
Beaded bracelets are among the most popular and flexible designs, suitable for all ages. To start, gather your beading supplies, which typically include beads, elastic cord, and scissors. You can create beautiful patterns or a random assortment of colors and shapes, making each bracelet a unique piece of jewelry. For a simple bead bracelet, measure the length of cord needed (usually about 1.5 times the wrist size). Begin stringing your beads onto the elastic until you reach your desired design. Finally, tie a secure knot, and you have a stunning beaded bracelet ready to wear or gift!
Choosing the Right Beads
When selecting beads for your bracelet, consider various materials such as glass, wooden, or gemstone beads. Each type brings a different texture and aesthetic. For instance, gemstone beads add a touch of elegance while wooden beads offer a rustic charm. Experiment with different types of beads to find combinations that resonate with your style. Additionally, always think about the size of the beads, as larger beads may require a thicker string or cord.
Creative Beading Techniques
One way to elevate your beaded bracelet game is by incorporating mixed media. Consider adding components such as charms or thematic beads to convey personal stories or memories. You can also play with different knotting techniques between beads to create space and visual interest in your design. This approach not only enhances the overall look but allows for deeper personalization, making these DIY bracelets special keepsakes as well.
2. Friendship Bracelets
Making friendship bracelets is a heartfelt way to celebrate your connections with loved ones. These bracelets often feature vibrant colors and patterns, and they can be easily made using embroidery floss or yarn. Start by cutting strands of **floss** to your desired length (about 24 inches is ideal). Tie them in a knot and start braiding or using simple weaving techniques to create your desired pattern.
Classic Knotting Techniques
The classic technique for friendship bracelets is known as the **forward knot**, where you make a series of knots with one string over another. This accessible method allows for endless pattern combinations, making it easy to customize each bracelet. You might also consider using the **Chevron pattern**, which creates a beautiful V shape and adds visual depth to your bracelet. You can find various tutorials online that provide step-by-step instructions and patterns to keep you inspired.
Personalizing Your Friendship Bracelets
To cheer up a friend or commemorate a special occasion, personalize a friendship bracelet by using their favorite colors or incorporating meaningful charms. This thoughtful addition transforms a simple bracelet into a treasured gift. You can always experiment with combining different tying techniques or even adding beads for a bit of sparkle. The personal touch makes your handmade bracelets even more precious.
3. Braided and Woven Bracelets
Braided and woven bracelets enhance your creativity and allow for intricate designs that stand out. Utilize a variety of cords, such as leather or cotton, based on the look you’d like to achieve. For a beautiful braided effect, gather three strands and simply braid them together, securing the ends. Woven styles can involve more techniques such as crisscrossing patterns, inviting different colors and materials for added dimension.
Using Leather for Braiding
Leather is a fabulous material that you can experiment with when braiding bracelets. Leather cords can add a more sophisticated touch and are perfect for adult bracelets. Start by cutting your leather into equal lengths, and follow the standard braiding technique. Adding occasional knots can also give the bracelet a playful twist! Remember to treat the leather with a protective finish to ensure durability against wear and tear.
Combining Different Materials
Consider mixing different materials such as fabric, beads, or chains into your braided or woven creations. This provides an opportunity to create **trendy bracelets** that reflect your personal style. Don’t hesitate to add closures like buttons or magnetic clasps for ease of wear, blending both aesthetics and functionality into your custom designs.
4. Unique Charm Bracelets
Charm bracelets are a creative way to tell a story through jewelry. These bracelets often blend various charms representing significant events, hobbies, or memories that resonate with the owner. You can use a simple chain bracelet and attach charms with jump rings, or opt for a charm bracelet kit that includes everything needed to assemble.
Choosing Charms for Your Bracelet
When selecting charms, consider personal significance; choose items that resonate with you or the recipient if gifting. Options might include letters, birthstones, symbols, or thematic charms that reflect one’s passions or milestones. With many available charm types, the possibilities for creating an expressive bracelet are limitless.
Embellishing Your Charm Bracelet
To enhance your charm bracelet, consider incorporating beads or other embellishments that match or contrast with your charms. This layered approach adds texture and visual interest. You can use adjustable bracelet clasps to make it easy to put on and take off, accommodating different wrist sizes. The beauty of charm bracelets lies in their versatility—every addition makes it more unique!
5. Adjustable Bracelets and Anklets
Adjustable bracelets and **anklets** are another great way to ensure a perfect fit, making them suitable for various wearers. You can craft these by incorporating sliders or adjustable knots that allow for size variation. You can use materials such as strings, leather, or beaded components to create a harmonious look tailored to style preferences.
Creating Adjustable Knots
A common technique for crafting adjustable bracelets involves a simple knotting method known as the **sliding knot**. This technique creates a “sliding clasp” at the end of your bracelet or anklet, enabling comfortable adjustments! To master this method, ensure you practice until you’re confident, as it creates the perfect custom fit that is both functional and stylish.
Showcasing Your Anklet Designs
Anklets can take the same vibrancy as your bracelets while also being casual or featuring elaborate designs. Consider using colorful beads or charms that resonate with summery vibes for a perfect look. You can go simple or vibrant, layering different anklet designs for a stylish festival outfit for your look! With adjustable styles, friends can share fun DIY projects and craft together!
6. Wire and Resin Bracelets
For those adventurous in their crafting journey, wire and resin bracelets offer endless creative opportunities. Using wire, you can shape intricate designs around a cuff or create unique structures. Pairing this with resin casting allows for bold colors and beautiful shapes that even incorporate **embedded items**, like flowers or glitter.
Working with Wire
When working with wire, specialized tools are key. You’ll need wire cutters, pliers, and adequate wire for a sturdy base. To create stylish designs, experiment with looping and winding the wire in different shapes. These specific techniques can help you create modern and artistic jewelry that makes a statement. Once satisfied with your wire design, you can use **resin** to create pieces that encapsulate charm or create fashionable cuffs.
Resin Techniques for Quality Finish
To craft resin bracelets, ensure you follow safe application and mixing processes. You can customize the color by adding pigments and also incorporate decorative pieces into the resin before pouring. After setting, you’ll achieve intriguing designs that are entirely unique! Remember to follow mold instructions for the proper outcome. This method helps create stunning pieces that are valuable handmade gifts.
7. Easy-to-Make String Bracelets
For beginners or kids interested in crafting, string bracelets present a fantastic choice. Using a simple string and basic knotting techniques, you can host fun bracelet-making sessions that result in colorful and vibrant accessories! These bracelets are not only easy to create but also allow for group creativity and bonding.
Fun Projects for Kids
Planning a crafting day with kids can become a rewarding experience. Simple string bracelets made with colorful embroidery floss or basic yarn can be done easily. Introduce them to different techniques like braiding or simple knot patterns. Providing fun materials encourages creative expression and enhances fine motor skills through a fun DIY activity!
Incorporating Patterns and Ideas
Encourage building on string bracelet basics by introducing simple patterns that make their designs pop. Geometric shapes through repeated knots or using different color sequences can drive color creativity. Most importantly, remember to nurture their imaginative ideas, allowing any combination to express their individuality through these special handmade bracelets.
Key Takeaways
- Explore various materials: From beads to leather and resin, each material opens a unique pathway to creativity.
- Personalize your designs: Reflect your style or tell a story by incorporating personal elements into your bracelets.
- Try different techniques: This allows for a range of additions to your bracelets, making them truly one-of-a-kind.
- Engage in community crafting: Share ideas or participate in crafting events to boost your creativity.
- Enjoy the process: Whether for fun or a thoughtful gift, crafting bracelets should always retain an element of enjoyment!
FAQ
1. What materials do I need to start making bracelets?
To begin your journey into jewelry making, gather essential materials such as various types of beads, an elastic string, scissors, and necessary tools like wire cutters or pliers. Depending on your chosen style embrace diverse materials like leather or macrame cords for enhanced creativity in your designs.
2. Are there beginner classes for bracelet making?
Yes! Many local craft shops or community centers offer classes tailored to beginners in bracelet making. These classes often explore basic techniques, styles, and pattern-making systems with experienced crafters guiding you. Online tutorials and workshops also provide an easily accessible resource for learning at your preferred pace.
3. How do I ensure my bracelets are adjustable?
To create adjustability, implement knots, such as the sliding knot or unique clasps focused on sliding functions. This precision adjustment ensures a flexible fit for different wearers. Incorporating findings or clasps that encourage ease during wear also boosts a bracelet’s usability.
4. What are some unique ideas for charm bracelets?
For a personal touch, consider theme-based charm bracelets. Choose from categories like travel, hobbies, or memorable experiences. Include letters or symbols representative of important moments in your life to create a meaningful, expressive bracelet. Regularly adding new charms can keep your charm bracelet evolving!
5. How can I keep my crafting materials organized?
To maintain an efficient workspace, consider investing in compartments or storage boxes to separate various components such as beads, strings, and tools. Establishing a designated crafting area can streamline your process, making finding materials easier for your next creative endeavor!