
“`html
Effective Ways to Lay Laminate Flooring in 2025: A Comprehensive Step-by-Step Guide
When it comes to **laminate flooring installation**, having the right strategy can significantly affect the outcome of your project. This guide will walk you through the key steps to install laminate flooring efficiently in 2025. You’ll learn about preparation, essential tools, and best practices to ensure that your new flooring not only looks beautiful but lasts for years to come. Let’s dive into the detailed process of **how to install laminate flooring** correctly.
Preparing for Laminate Flooring Installation
The first step in the **laminate flooring installation** process is **laminate floor preparation**. This involves getting your space ready to ensure a seamless and successful flooring installation.
Preparing the Subfloor
Before you start laying down your **laminate flooring**, it’s crucial to prepare the **subfloor** to ensure a level and clean surface. Check for any imperfections, such as bumps or unevenness, and address those issues. Most laminate manufacturers recommend a maximum tolerance of 1/8 inch over a 10-foot span. You can use leveling compound to correct any significant flaws that may lead to uneven flooring once installed.
Measuring the Space for Laminate
Next, accurately **measure the space for laminate** flooring. Use a tape measure to calculate the length and width of the area you will install. Don’t forget to account for the **laminate flooring expansion gaps**, which are necessary to allow the flooring to expand and contract with temperature changes. A good rule of thumb is to subtract approximately 10% from your total measured area to account for waste and miscuts.
Choosing the Right Underlayment
Choosing an appropriate **underlayment for laminate flooring** is essential as it provides a cushion for the laminate, absorbs sound, and aids in moisture protection. There are various types, including foam, cork, and 6-mil polyethylene. Make sure to pick an underlayment compatible with your laminate flooring type to achieve the best results.
Tools Required for Laminate Flooring Installation
Having the right tools makes a significant difference in the ease and outcome of your installation. Below, we outline the essential **tools for laminate flooring** installation.
Essential Tools for Installation
Gather the necessary tools before your project begins, including:
- Accurate measuring tape
- Cutting tool (laminate cutter or table saw)
- Hammer and tapping block
- Pull bar for tight spaces
- Chisel for edges
- Utility knife and straight edge for cutting the underlayment
This will minimize interruptions during the installation process.
Common Mistakes to Avoid
Newbies often make mistakes such as installing without proper underlayment or neglecting to leave adequate expansion gaps. Familiarizing yourself with these **common laminate flooring mistakes** can save you time and money. Always refer to the manufacturer’s instructions for specific recommendations. Remember, patience and proper technique are key in achieving a flawless finish.
Final Checks Before Starting
Before officially starting your **laminate flooring installation**, do a brief final inspection of the tools and your workspace. Make sure all necessary materials are on hand and that your work area is clean and uncluttered. An organized space can greatly enhance your workflow.
Laying Down Laminate Flooring
Now that your space is prepared and you have your tools ready let’s talk about the essential techniques you will use for **floating laminate flooring installation**.
Understanding the Laminate Flooring Layout
Choose a **laminate flooring layout** pattern that best suits your space. The most common patterns are parallel to the longest wall, diagonal layouts, or a herringbone effect. Selecting the right orientation can enhance the look and feel of your room. For example, laying planks parallel to light sources will usually give the room a more spacious appearance.
Cutting Laminate Flooring to Fit
Once you’ve outlined your layout, you may need to adjust pieces to fit around corners or edges. **Cutting laminate flooring** requires precision; pressed edges should be gripped firmly, and cuts should be made slowly for straight edges. Mark your cuts using a straight edge and your utility knife before applying your saw. Practice on a scrap piece if you are new to using cutting tools.
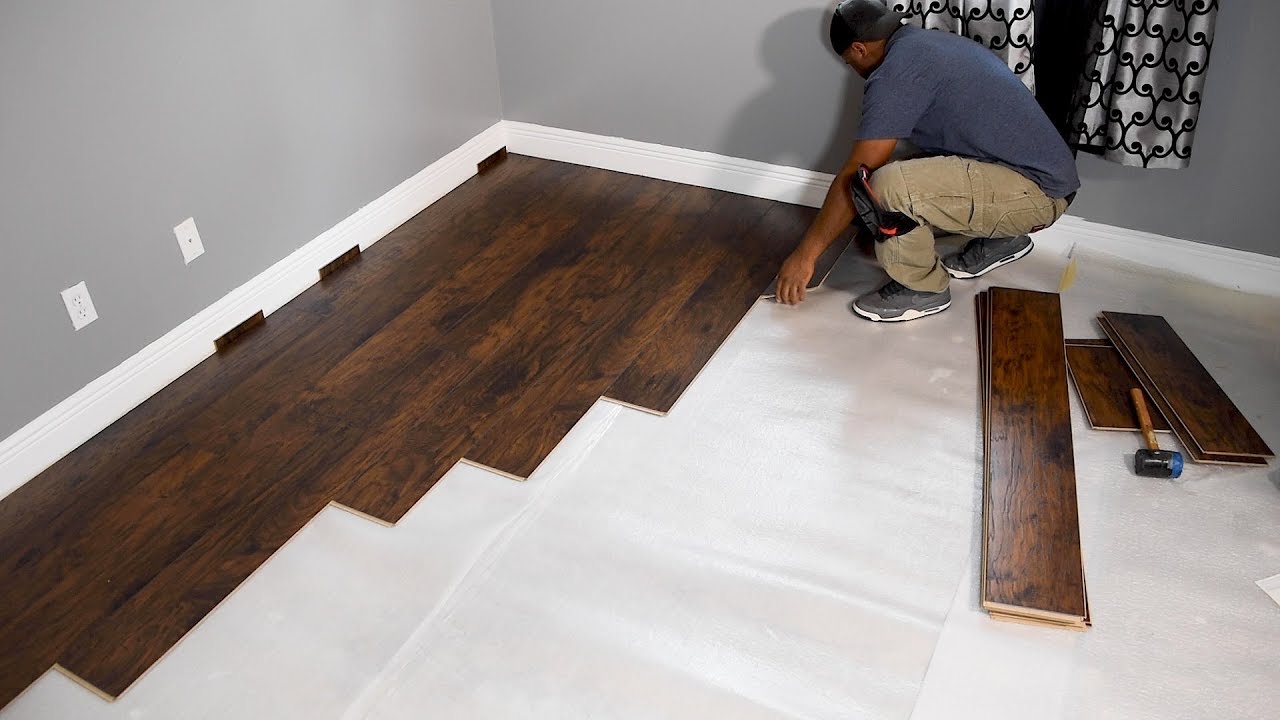
Installing the Planks
Start installing the planks in the corner of the room, working your way outwards. Ensure that the **laminate flooring patterns** align properly and use spacers to maintain **expansion gaps**. It’s advisable to install planks from different boxes interchangeably to create an organic look and prevent patterns from becoming too repetitive. Each row should be staggered about 12 inches from the previous one to strengthen the installation.
Finishing Touches to Your Laminate Flooring
With the flooring now laid, it’s time to finish up with the additional components for a complete look and functionality.
Installing Transition Strips
Once the **laminate flooring** is laid, carefully add **laminate flooring transition strips** where your laminate meets other types of flooring. These strips provide a seamless transition and prevent edges from chipping or peeling. Make sure to measure the strips correctly to ensure a proper fit —they should cover any expansion gaps between flooring types.
Baseboards and Trim Installation
After installing the transition strips, it’s time to go back and finish with the baseboards. Use a nail gun to ensure the trim is secured in place without damaging your new flooring. This step will help create a polished final product while covering expanding gaps along walls.
Maintenance and Care for Longevity
Now that you handily completed your **laminate flooring installation**, proper care is essential to ensure durability. Regular cleanings using a soft broom or a damp mop will keep your floors looking pristine. Be mindful to follow some **laminate flooring maintenance tips**, such as avoiding harsh chemicals that might damage the flooring surface.
Key Takeaways
- Start with a clean and properly measured sub-floor.
- Invest in quality underlayment for best results.
- Use the right tools and familiarize yourself with common pitfalls.
- Lay planks strategically to enhance the room’s aesthetic.
- Finish with proper margin and trim work for a complete look.
FAQ
1. What are the best laminate flooring brands?
Some of the best laminate flooring brands include Shaw, Mohawk, and Pergo. These brands are known for their durability, wide variety of styles, and user-friendliness during the **laminate flooring installation** process.
2. What is the average cost of laminate flooring installation?
The **laminate flooring cost** can vary widely depending on the brand, thickness, and the area of installation. Generally, you can expect to pay an average of $1 to $5 per square foot for materials, with installation fees bringing total costs to anywhere between $2 to $8 per square foot.
3. Can I install laminate flooring in kitchens and bathrooms?
Yes, **laminate flooring for kitchens and bathrooms** is available, especially those designed with moisture-repellant technology. Look for **laminate flooring waterproof options** to ensure longevity in moisture-prone areas.
4. How do I maintain laminate flooring?
To maintain your **laminate flooring**, ensure regular cleaning with a soft-bristled broom or a damp mop. Avoid excess water, as it can damage the integrity of the flooring. Implement the tips discussed, and your laminate will appear new for years.
5. Are there eco-friendly options for laminate flooring?
Yes, several brands offer **eco-friendly flooring options** that use sustainable materials and practices. Always check certifications like CARB or FloorScore which indicate adherence to environmental standards during your **laminate flooring installation**.
“`